Patio Furniture After Winter Storage: How to Deep Clean & Restore
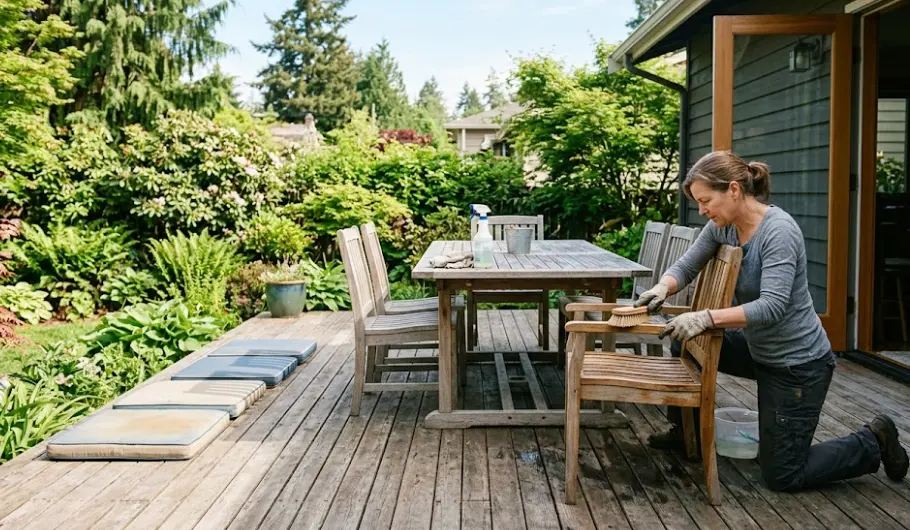
You pop the lid on the storage bin in late May and get hit with that smell. It's not overwhelming — not yet — but it's there. That particular combination of damp foam, mildew, and enclosed-air staleness that tells you the winter was harder on the cushions than you'd hoped. The furniture comes out looking grey, the fabric stiff, the frames dusty with whatever accumulated in the shed. It's the same scenario every spring for a lot of Seattle homeowners, and the question is always the same: where do you actually start, and how much of this can be saved?
The answer, in most cases, is more than you think — but only if you approach the post-storage clean in the right order. Grabbing the hose and going straight at the cushions without checking the foam first is the mistake that turns a salvageable set into a replacement project. This guide covers the complete post-winter restoration sequence for patio furniture cleaning after winter storage: what to assess before you touch anything, the specific methods for restoring outdoor cushions in spring, how to approach each frame material, and the signs that tell you professional help will get you further than repeated DIY attempts.
What a Seattle Winter Does to Furniture in Storage
The deterioration that happens to outdoor furniture during Pacific Northwest storage is worth understanding, because it changes how you approach the clean. Seattle's garage and shed environments over winter tend to sit at 40–55°F with relative humidity between 65 and 80 percent — conditions that are almost ideal for slow mold establishment, particularly in enclosed, low-airflow spaces.
The problem compounds if the furniture wasn't fully dry when it went in. Most homeowners clean in late September or October before the weather turns, which is the right instinct — but autumn cleaning in Seattle often happens on overcast days with limited drying time. If cushion foam is even slightly damp when stored, the first few weeks of storage complete the mold cycle that was just beginning outdoors. By January, what started as surface mildew on fabric has had three months to work its way toward the foam core in the enclosed storage environment.
Temperature cycling also matters. Stored foam that cycles between 38°F and 55°F repeatedly over five months compresses slightly at low temperatures and expands at higher ones. Over a full winter this cycling can drive any residual moisture deeper into the foam. Unlike outdoor mold, which grows primarily on exposed surfaces, stored mold often develops on both faces of the cushion because they've been in contact with a storage bin or bag on one side and another cushion on the other. This is why post-storage cleaning requires treating both sides of every cushion — something a lot of people miss the first time through.
Frames have their own storage-specific issues. Teak loses moisture in storage rather than gaining it — the wood arrives in spring drier than it would be after months outdoors, which means applying oil immediately after pulling it out is a mistake covered in detail below. Wrought iron frames stored in an unheated garage with fluctuating humidity are susceptible to rust at joint points and along horizontal surfaces where condensation tends to pool. Aluminum fares much better, but powder coat failures that were minor in autumn can spread over a winter if moisture gets underneath.
| Component | What Winter Storage Does to It | What to Check First |
|---|---|---|
| Foam cushion inserts | Slow mold establishment in low-airflow storage; temperature cycling drives moisture deeper; compression from stacking | Squeeze test — smell intensifying under compression indicates foam-core mold. Check both sides of the cover, not just the top. |
| Fabric covers | Surface and contact mold on both faces; possible stiffness from cold; colour dulling from mildew film | Inspect bottom face — often worse than top in storage because it rests against bin or another cushion. |
| Teak frames | Greying advances; wood dries out in low-humidity storage; surface checking may appear in top layer | Acclimatise 24–48 hours before treating. Press thumb firmly — sound teak will not yield at all. |
| Wrought iron / steel | Rust develops at joint points and horizontal surfaces from condensation cycling; existing paint chips spread under the coating | Inspect all welds and joints first. Surface rust is treatable; through-rust at structural points is a replacement indicator. |
| Aluminum | Powder coat failures spread over winter; oxidation under compromised coating | Check for chalking on flat surfaces and peeling at joints. Structurally aluminum almost never fails — damage is cosmetic. |
| Synthetic wicker / rattan | Temperature cycling makes resin more brittle; strands borderline in autumn often crack by spring | The squeak test — flex individual strands gently. Healthy wicker flexes quietly. Brittle wicker crunches or cracks under gentle pressure. |
Assess Before You Clean — the Order Matters
The instinct when furniture comes out looking bad is to start cleaning immediately. Resist it. Fifteen minutes of assessment before you touch any cleaning products tells you exactly what you're dealing with, and whether DIY cleaning is the right call at all — potentially saving you from a weekend of effort that doesn't reach the source of the problem.
Foam Assessment First
Before inspecting fabric or frames, go straight to the cushion foam. Unzip each cover and visually inspect the foam insert — look for grey-green or black mold growth on the foam surface itself. Then perform the squeeze test: press the foam centre firmly with both hands and release, then bring your nose close. If the smell intensifies noticeably when compressed, mold is established in the foam interior. Surface mold on fabric cleans well with DIY methods. Foam-interior mold does not — it requires professional hot-water extraction that reaches inside the foam, or foam replacement. Knowing this before you spend three hours scrubbing fabric saves time and prevents the frustration of the smell returning within a week of a thorough clean.
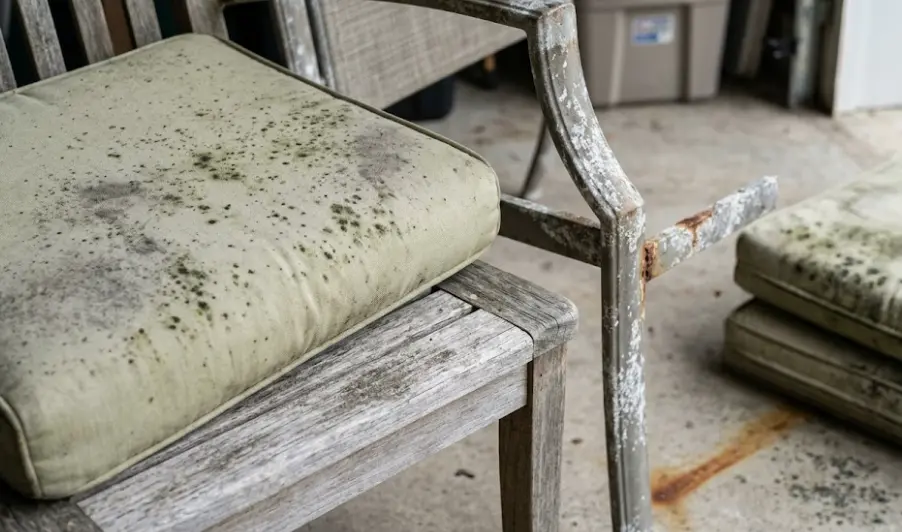
Inspect Both Faces of Every Cushion Cover
Turn each cushion cover over and inspect the bottom face — the side that rested against a storage bin or another cushion. Outdoor mold grows mainly on exposed top surfaces. Stored mold often develops worse on the bottom face because it had no airflow and sustained contact with a surface that may have accumulated condensation. The bottom face of a stored cushion frequently shows heavier mold growth than the visible top, and missing it means you've cleaned only half the problem. If the bottom face shows extensive mold while the top looks relatively clean, that's the specific pattern of storage deterioration — still treatable in most cases, but both surfaces need full treatment.
Structural Check on All Frames
For wood frames: press your thumb firmly into each board, particularly at joints and areas where water may have pooled. Sound teak and cedar will not compress at all under thumb pressure. Any spot that yields noticeably indicates rot that has progressed beyond cosmetic deterioration. For metal: inspect every weld and joint for cracking or through-rust. Surface rust (orange-brown discoloration you can feel as slight roughness) is different from through-rust (the metal has corroded to a hole, or the weld itself is cracking). The former is treatable; the latter is a structural failure that no cleaning will fix. For wicker: flex individual strands gently. Healthy wicker flexes without sound. UV-degraded wicker crunches or cracks even under light pressure.
Cleaning Post-Storage Outdoor Cushions — the Full Method
Post-storage cushion cleaning requires a more thorough approach than mid-season spot cleaning. You're dealing with mold that has had months to develop, often on both fabric faces, with potential odour absorbed into the foam. The steps below cover the full sequence.
Temperature Normalisation Before Cleaning
Take cushions outside and let them sit in the open air for at least 2–4 hours before starting. This is not optional prep-work — it genuinely matters. Foam at 42°F is denser, more resistant to liquid penetration, and less able to release trapped odour during cleaning. Cleaning solution applied to cold foam tends to sit on the surface and rinse away without penetrating where the mold lives. Letting foam warm to outdoor ambient temperature in Seattle's late spring (typically 55–65°F) significantly improves how deeply the cleaning solution works. On a cold overcast day, extend the warming time or bring cushions indoors for a few hours first.
Dry-Brush Loose Mold Before Wetting
Using a stiff-bristle brush or the upholstery attachment of a HEPA vacuum, dry-brush all fabric surfaces — top, bottom, and sides — before applying any liquid. This removes loose mold colonies, dust, and debris that would otherwise get pushed deeper into the fabric weave when wet. Do this outdoors and upwind of any open windows. For anyone in the household with respiratory sensitivities, wear an N95 mask during this step — dry-brushing mold releases spores into the air around you.
Identify Your Fabric and Choose the Right Solution
Check the care tag sewn into each cushion cover — it will have a W, S, WS, or X code. W and WS codes (the vast majority of outdoor cushions) are safe for water-based cleaning. For post-storage mold, use an oxygen bleach solution rather than basic soap and water: dissolve 1/4 cup of OxiClean or similar oxygen bleach powder in one gallon of warm water. For Sunbrella and other solution-dyed acrylic fabrics specifically, a diluted chlorine bleach solution (1 cup per gallon of water plus 1/4 cup of dish soap) is safe and more effective against stubborn storage mold — Sunbrella's manufacturer permits this, though it would cause permanent damage on polyester or canvas. Our guide on identifying upholstery fabric before cleaning covers the full coding system if you're uncertain of your fabric type.
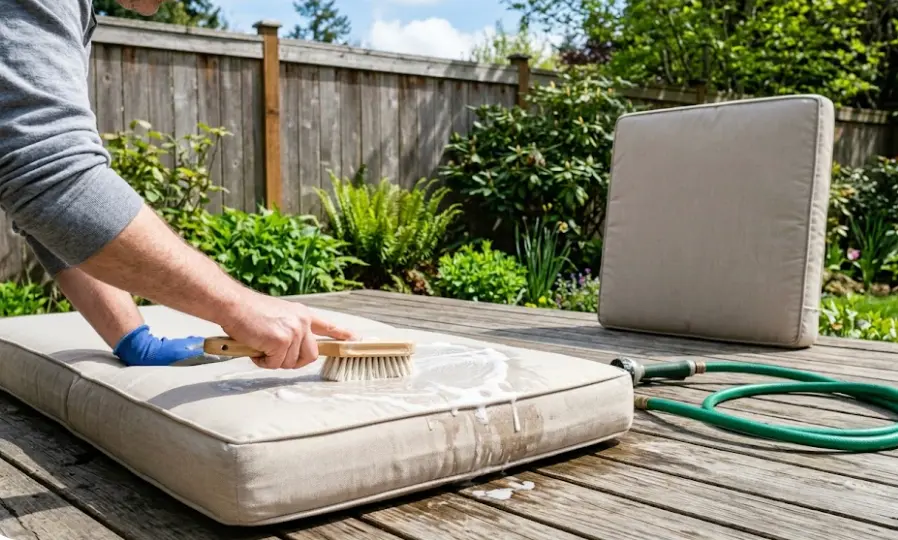
Pre-Rinse, Apply to Both Faces, Then Let It Dwell
Rinse both fabric surfaces thoroughly with a garden hose to saturate the fabric. Then apply the cleaning solution generously to the top surface and immediately flip and apply to the bottom — both faces need full treatment in post-storage cleaning, not just the visible top. Scrub with a soft-bristle brush in circular motions on heavily affected areas, back-and-forth on lighter areas. Pay particular attention to the piping seams where mold accumulates in the texture. Allow the solution to dwell for 15–20 minutes — longer than you'd use for routine mid-season cleaning, because the extended dwell time is what breaks down mold colonies that have had months to establish. On a warm day, mist the fabric lightly if it starts to dry during the dwell period.
Rinse Until the Water Runs Completely Clear
Rinse both sides of each cushion cover thoroughly, continuing until the water running off is absolutely clear — no suds, no discoloration, no grey residue. Squeeze the fabric firmly at several points; if any suds appear when you squeeze, continue rinsing. Soap residue left in outdoor fabric acts as a food source for mold over the summer, rebuilding the problem you just cleaned. For oxygen bleach or chlorine bleach treatments, thorough rinsing is even more critical — bleach residue left on fabric causes continued oxidation and colour change as the season progresses.
Sun-Dry Upright — and Test Before Reassembly
Stand cushions on their edge so air circulates on both flat faces simultaneously. Direct sunlight matters beyond drying speed — UV is a natural mold inhibitor and helps neutralise residual odour that cleaning solution didn't fully reach. In Seattle's late spring, aim for a day with at least six hours of sun expected. When cushions appear dry externally, perform the palm test: press your palm firmly into the thickest part of the foam and hold for five seconds. A cool or damp sensation means the foam interior is still holding moisture. The surface fabric can feel completely dry while the foam two inches in is still significantly damp — this test reaches where touch doesn't. Reassemble, bring in, or use cushions only after the foam passes this test.
If the Smell Comes Back Within a Week
If musty odour returns within a few days of thorough cleaning and full drying, the source is the foam core, not the fabric surface. Surface cleaning cannot reach interior foam mold — the colony in the foam continues producing odour through the fabric cover regardless of how clean the fabric itself is. At this point, professional hot-water extraction or foam replacement is the next step. Repeated DIY surface cleaning without addressing the foam will cycle the same result indefinitely. See our detailed guide on mold on patio cushions for how to assess foam contamination severity and decide between extraction and replacement.
When Covers Are Removable: Machine Washing After Winter Storage
Many quality outdoor cushion covers have zipper closures. If yours do and the care tag permits machine washing, this is a viable option for the fabric covers specifically — with caveats:
Safe Machine Wash Approach
- Cold water only — hot water shrinks and weakens outdoor fabric coatings
- Gentle cycle, minimal spin
- Add 1/2 cup of oxygen bleach powder directly to the drum alongside mild liquid detergent — this handles post-storage mold during the wash cycle itself
- Turn all covers inside out before loading — the inner face needs treatment too
- Close all zippers to prevent snag damage
- Never machine dry — heat degrades outdoor fabric coatings. Hang or stand to air-dry in direct sun after washing
What Machine Washing Won't Solve
Washing covers while foam inserts remain untreated is a partial solution. If the foam has absorbed mold odour during storage, clean covers placed back on contaminated foam will begin to smell again within days. Treat foam inserts separately: for surface odour without visible foam mold, dissolve oxygen bleach in a bucket of warm water and work it through the foam by squeezing and releasing, then rinse by squeezing in clean water several times. For visible mold on the foam itself, or smell that intensifies when compressed, professional hot-water extraction or foam replacement is the appropriate step — not repeated cover washing that never addresses the actual source.
Cleaning and Restoring Frames After Winter Storage
Frame cleaning in spring is distinct from the mid-season wipe-down. After months in storage, every material type needs a more deliberate approach — not just cleaning, but assessment and protective treatment before the outdoor season begins. The right sequence varies significantly by material.
Teak and Cedar
The acclimatisation rule first: Never apply teak oil or sealant straight out of storage. Wood stored at 42–50°F for six months has lower moisture content than it will have once it's outdoors in May. If you apply oil immediately, you risk trapping moisture inside the wood as it equilibrates to outdoor humidity — which can cause interior darkening and accelerated surface checking. Set teak furniture outdoors for 24–48 hours before any treatment is applied. It's a step most people skip, and it's also where many teak treatments go wrong.
After acclimatisation, clean with a dedicated teak cleaner — oxalic acid-based products like Star Brite Teak Cleaner or Semco Teak Cleaner work well. Apply with a soft brush along the grain, allow 5–10 minutes of dwell, scrub gently, and rinse thoroughly. If greying is significant, a two-part teak brightener (cleaner followed by brightener) will restore the honey tone before oiling.
Sand lightly with 120-grit along the grain if surface checking is present, finish with 220-grit, wipe all dust clean, then apply teak oil or sealant in a thin coat. Wipe excess after 20 minutes, apply a second coat the following day. For Seattle's climate, a teak sealant rather than a basic oil gives 12–18 months of protection versus 6–8 months — meaningfully fewer applications needed over Seattle's wet season cycle. If you prefer the natural grey patina, skip the oil entirely, but still clean and inspect joints annually.
Wrought Iron and Steel
Weld and joint inspection before anything else: Examine every weld point and joint under good light. Surface rust — orange-brown discoloration you can feel as slight roughness or pitting — is entirely treatable. Through-rust — where the metal has corroded to an actual hole, or where a weld is cracking or separating — is a structural issue that painting over will not hold against. Distinguishing between the two before committing time and materials to restoration is the most important call for iron furniture.
For surface rust: wire-brush all affected areas back to clean metal. Apply a rust converter product (phosphoric acid-based) to any remaining rust staining — this chemically stabilises iron oxide into a paintable compound rather than simply painting over active rust. Apply a rust-inhibiting primer to all treated areas, paying particular attention to joints and horizontal surfaces where water pools. Topcoat with outdoor enamel in two thin coats. Allow 48–72 hours of cure time before weather exposure.
For furniture with no visible rust, only paint fading or surface contamination from storage: clean with mild soap and water, dry thoroughly, then apply carnauba paste wax to all metal surfaces. This moisture barrier significantly reduces rust initiation over the coming season and restores a subtle sheen that makes the furniture look better without repainting.
Aluminum
Aluminum is the most storage-resilient frame material in Seattle's climate. The frame itself won't rust or rot — the issues after a storage winter are almost entirely cosmetic: powder coat dulling, chalking on flat surfaces, and oxidation at areas where the coating has failed.
Clean with a dedicated aluminum cleaner, or a 1:1 white vinegar and water solution for lighter oxidation. For heavier chalking on flat surfaces, car-care aluminum polish removes the oxide layer without abrasive damage to the metal. Work in sections, rinse well. Where powder coat is peeling across larger sections rather than at isolated chips, an automotive self-etching primer before repainting gives significantly better adhesion than painting bare aluminum directly.
After cleaning, apply automotive paste wax to all frame surfaces — this restores sheen and creates a moisture barrier that slows re-oxidation considerably. It's a 20-minute step that comfortably extends the good appearance of an aluminum frame by an additional two to three seasons in Seattle's wet environment without any painting needed.
Synthetic Wicker and Rattan
Spring is when storage-damaged wicker reveals its true condition. Temperature cycling over winter accelerates the UV-driven brittleness that accumulates in resin strands over years. Use the squeak test before cleaning: flex individual strands gently with your fingers. Healthy resin wicker flexes smoothly and quietly. Wicker that has crossed the brittleness threshold produces audible cracking or crunching under gentle pressure — and that degradation will continue regardless of how well you clean it.
For wicker that passes the flex test, clean with a mild soap and water solution worked into the weave with a soft brush, then rinse with a garden hose on a gentle setting. A low-pressure spray from 18 or more inches is safe for moving debris out from deep in the weave structure. For faded colour on structurally sound wicker, a plastic-formulated spray paint restores appearance well.
For isolated strand failures — a few snapped sections on an otherwise intact set — resin wicker repair kits are available and work reasonably well for small areas. For widespread brittleness across seating surfaces, further investment in cleaning or repainting produces a piece that continues to fail under normal sitting use. At that point the material has reached end of life and a structural decision needs to be made. Our full guide on patio furniture restoration versus replacement covers the decision framework for wicker and other materials in detail.
Protective Treatment Before the Season Starts
The last step in post-storage restoration — and the one that determines how long your work holds — is applying appropriate protective treatment before the furniture goes into regular outdoor use. This is done after cleaning and full drying, not before. Applying protectant over damp fabric or uncleaned surfaces traps the very problems you just removed.
Fabric Protectant
Once cushion covers are completely clean and dry, applying a fabric protectant spray — Scotchgard Outdoor Water Shield, Kiwi Camp Dry, or a similar silicone-based outdoor product — re-establishes the water-repellent coating that degrades over time and through washing. Apply on a dry day with no rain in the forecast for 24 hours. Hold the can 6–8 inches from the fabric and apply in two light, even coats rather than one heavy one. This step is particularly worthwhile after a post-storage deep clean that stripped some of the fabric's existing coating during the mold treatment process. A re-coated fabric sheds rain and morning dew rather than absorbing them, which dramatically reduces the pace of future mold establishment.
Teak Oil or Sealant
Applied after acclimatisation and cleaning as described. Use a brush or lint-free cloth, work strictly along the grain, and wipe away the excess after 20 minutes — pooled oil that doesn't penetrate attracts dust and darkens unevenly as it oxidises on the surface. A teak sealant (polymerising oil formula, not a surface lacquer) gives 12–18 months protection in Seattle's wet season cycle. Basic teak oil needs re-application every 6–8 months. If you prefer the grey patina, skip the oil — but still inspect joint integrity annually. A teak set left grey and unexamined for two or three years is where structural issues begin to hide under the weathered surface.
Metal Wax and Touch-Up
For wrought iron that has been rust-treated and repainted, allow the topcoat to cure fully — 48–72 hours — before applying carnauba paste wax as a final moisture barrier over the new paint. For aluminum, the paste wax goes on right after cleaning with no primer or paint needed if the powder coat is intact. Touch up any isolated paint chips on iron furniture with a matching enamel paint pen before the season begins. A chip caught before rust initiates takes five minutes to address; the same chip ignored until autumn takes three hours of wire brushing and repainting. That's the full logic of the spring touch-up routine.
When DIY Post-Storage Cleaning Isn't Enough
Most post-winter patio furniture cleaning is a manageable DIY project for a full day. There are specific situations, though, where professional cleaning reaches results that repeated home attempts cannot match — and recognising them before spending a full weekend on an incomplete fix saves significant time and money:
Foam-Core Mold Contamination
When the squeeze test produces intensified musty odour, or when you can see mold on the foam insert itself, DIY surface cleaning won't reach the source. Professional hot-water extraction pushes cleaning solution physically into the foam core and then extracts it along with the mold, spores, and contaminated moisture. This is fundamentally different from surface scrubbing — it addresses the same foam interior that stored mold penetrates during months in a humid, enclosed environment. If the smell has returned twice after DIY cleaning attempts, this is the step that breaks the cycle rather than repeatedly delaying it. For a detailed assessment of foam contamination severity, see our mold on patio cushions guide.
High-Value Sets
Teak furniture at a $2,000–$5,000 replacement cost, custom cushion sets, or premium wicker sectionals have enough value that incorrect product selection during DIY cleaning — wrong bleach concentration on a non-Sunbrella fabric, applying a sealant over an oil-finished surface, pressure washing wicker beyond safe PSI — can cause permanent damage that costs more to address than professional cleaning would have cost. Our team identifies the precise material type before choosing any product, which eliminates the risk that comes with applying generalised DIY advice to a specific fabric you haven't positively identified.
Allergy and Asthma Households
The dry-brushing and scrubbing steps of post-storage cleaning release mold spores into the air around you. For household members with mold sensitivity, asthma, or respiratory conditions, this can trigger significant reactions — the outdoor setting doesn't fully contain spore dispersal when you're actively disturbing established mold colonies. Professional cleaning involves appropriate containment and high-efficiency extraction that captures spores during the process rather than releasing them. For households with mold-sensitive individuals, the health case for professional post-storage cleaning is as strong as the practical one. See our guide on how mold and dirty upholstery affect indoor allergies for the airborne spore detail.
Combined Frame and Cushion Restoration
When post-storage assessment reveals that the frame needs rust treatment and repainting in addition to cushion deep cleaning, you're looking at a multi-step project across several days. Professional scheduling lets you coordinate cushion extraction, drying, frame treatment, and re-protection as a single organised visit rather than stretching work over multiple weekends with equipment scattered around the yard. For Airbnb properties or rental homes where outdoor furniture needs to be guest-ready quickly, same-day professional service is the practical option — call before 2 PM and we can typically be there same day across the Seattle metro. Our patio furniture restoration guide has full cost ranges for combined frame and cushion work by material type.
What Seattle Homeowners Say
"We pulled our patio set out of the garage in April after storing it in October — we'd cleaned it before storing but apparently not dry enough. The cushions had mold on the bottom face that we almost missed completely. We scrubbed them ourselves with vinegar and the smell came back within four days. Called Fresh Furnish, they did the professional extraction, and the smell hasn't returned three weeks later. Should have called first instead of spending a weekend on something that only partially worked."
"My teak furniture had been in storage all winter and came out looking completely grey and rough. I was genuinely ready to buy a new set and a friend suggested calling first. They cleaned it, sanded it, and oiled it — the transformation was dramatic. It looks better than it did three seasons ago. The cushions were done at the same time. Saved a significant amount and the furniture looks genuinely new. The advice about letting it acclimatise before oiling was something I'd never heard but made sense."
Frequently Asked Questions
Start by letting furniture air out for 2–4 hours outdoors to warm up from storage temperatures — cold foam doesn't absorb cleaning solution properly. Then assess foam inserts before touching anything else: unzip covers and compress foam, checking whether musty smell intensifies (indicating foam-interior mold requiring professional treatment). For surface mold on fabric: dissolve 1/4 cup oxygen bleach in one gallon of warm water, apply to both faces of each cushion, allow 15–20 minutes of dwell time, scrub gently with a soft brush, rinse thoroughly until water runs clear, and dry standing upright in direct sunlight for 12–24 hours. For frames: clean by material type (teak cleaner for wood, soap and water plus carnauba wax for aluminum, rust removal and enamel repaint for iron), then apply appropriate protective treatment before the season begins.
Treat both fabric faces with an oxygen bleach solution (1/4 cup per gallon of warm water), allowing a full 15–20 minutes of dwell time before rinsing completely. Rinse until water runs clear. Then dry in direct sunlight — UV is a natural mold inhibitor that helps neutralise residual odour that the cleaning solution didn't fully reach. After a full day of sun-drying and the palm test confirms the foam is dry, assess whether the smell is truly gone. If it returns within a week, the source is the foam core. Surface cleaning cannot address foam-interior mold that developed over months in storage — professional hot-water extraction or foam replacement is the appropriate next step at that point, not another DIY surface treatment.
In most cases, yes — even after a damp Pacific Northwest winter. The determining factor is whether mold has penetrated the foam core or is confined to the fabric surface. Surface and moderate mold on fabric covers responds very well to oxygen bleach treatment — even cushions that look significantly mold-damaged can often be restored to clean, fresh-smelling condition. The test: after thorough cleaning and a full day of sun-drying, compress the foam centre. If no musty odour intensifies under compression and the foam feels dry, the foam is clean. Don't make the replacement decision based on appearance alone before cleaning — the visual state after a storage winter consistently looks worse than the actual condition of the foam underneath.
A minimum of 6–8 hours in direct summer sun with good airflow. In Seattle's spring conditions — often overcast or partly cloudy — allow 12–24 hours. The reliable test is the palm test: press your palm firmly into the thickest part of the foam and hold for five seconds. A cool or damp sensation means the foam is still retaining moisture internally. The surface fabric can feel completely dry to touch while the foam two inches in is still significantly damp — the palm test reaches where surface touch doesn't. Stand cushions on their edge, not flat, to allow air to circulate on both faces. Using or storing cushions before the foam passes this test restarts the mold cycle immediately.
Acclimatise before treating — let teak stand outdoors for 24–48 hours before applying any oil or sealant. Wood stored at winter temperatures is drier than outdoor equilibrium; applying oil immediately can trap moisture as the wood warms and re-equilibrates. After acclimatisation, clean with an oxalic acid-based teak cleaner along the grain, rinse, and allow to dry fully — another 24 hours. Sand lightly with 120-grit then 220-grit along the grain if surface checking is present. Apply teak oil or sealant in a thin coat, wipe excess after 20 minutes, and apply a second coat the following day. For Seattle's wet season, teak sealant gives 12–18 months protection; basic teak oil needs re-application every 6–8 months.
Call a professional when: the musty smell returns within a week of thorough DIY cleaning — the reliable sign of foam-core mold that surface cleaning cannot reach; the set is high-value teak or premium cushioning where incorrect product choice risks permanent damage; anyone in the household has mold sensitivity or respiratory issues (disturbing stored mold releases airborne spores); the frame needs rust treatment and repainting in addition to cushion cleaning, making it a multi-day full restoration project; or you need it done quickly for a summer event or rental property. Professional post-storage cushion cleaning for a full patio set in the Seattle area typically costs $150–$350 — a fraction of replacement cost, and usually the step that resolves what repeated DIY surface cleaning cannot.
Related Outdoor Furniture Guides
Mold on Patio Cushions
Detailed assessment guide for mold on outdoor patio cushions — how to determine severity, whether foam is contaminated, and the right treatment approach from DIY oxygen bleach to professional hot-water extraction.
Patio Furniture Restoration
Honest cost comparison for patio furniture restoration versus replacement in Seattle — material-by-material guide, when restoration makes sense, and realistic cost ranges for professional services.
Outdoor Cushion Cleaning Guide
Complete seasonal routine for cleaning outdoor furniture cushions — fabric identification, DIY methods by material type, mold treatment by severity, and correct drying for Pacific Northwest conditions.
Ready to Get Your Patio Back in Shape After Winter?
If post-storage cushions smell off, look worse than they should, or you've already tried DIY cleaning and the problem came back — that's what professional foam extraction addresses. Fresh Furnish Cleaners provides post-winter patio furniture cleaning across Seattle, Bellevue, Kirkland, Redmond, and the greater Eastside. Same-day service available — call before 2 PM.
Foam-Core Extraction
Hot-water extraction that reaches inside the foam — the step that breaks the recurring mold odour cycle after storage
Same-Day Service
Call before 2 PM for same-day outdoor furniture cleaning across the Seattle metro area
Eco-Friendly Products
Safe for families, children, and pets — no harsh chemical residue on outdoor furniture or surrounding garden
Serving Seattle, Bellevue, Kirkland, Redmond, Bothell, Woodinville, Lynnwood, Edmonds, Shoreline & surrounding areas